Using the wizard
After the installation via a console, the rest of the setup is done via a webinterface (GUI).
When visiting the website you need to login with the user root and the
password you entered during the installation.
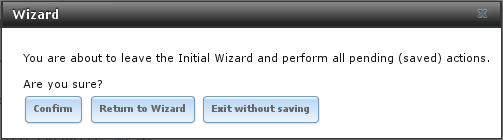
Then a installation wizard will be shown. If you press exit during any
step of the wizard, it will not apply any of the settings you set.
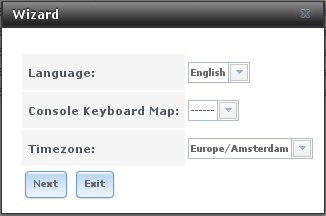
When you install FreeNAS on a system which already has a ZFS pool, the
wizard will allow you to import this pool.
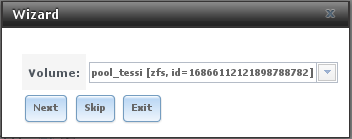
If it is a clean system, it will present the option to create a pool img
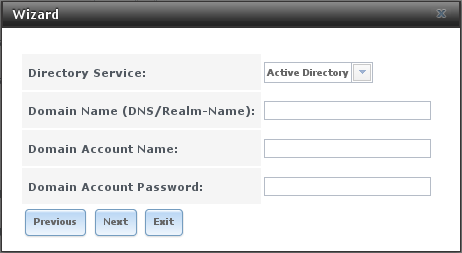
You could setup a connection to a Directory service, or just press next
to skip it.
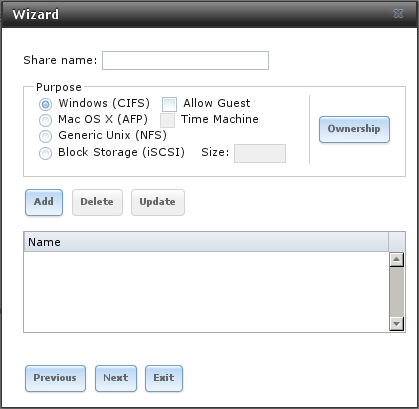
There no need to create shares, but it might be easy.
FreeNAS can sent an email when something important happens, but it has
to know the details
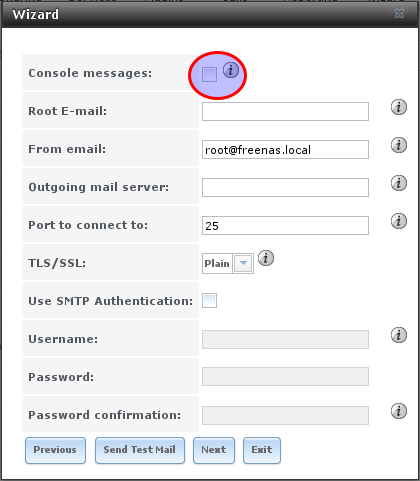 I used my default emailaddress for the root email address,
freenas@
I used my default emailaddress for the root email address,
freenas@
Only when you Confirm on the last wizard page, the changes will be applied.
Settings in the GUI
General
By default the hostname will be freenas.domain.you.entered.for.DNS. Normally you would want to change it to something useful for your setup. This can be done in System -> Information.
If you have own NTP servers in your network, you can change them via System -> General -> NTP Servers (button at the bottom of the screen).
Users
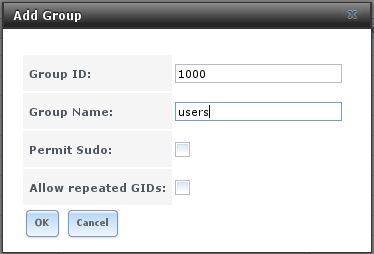
Since I will be using NFS for getting access to the data on the FreeNAS, I need to setup the right users I also have on my other systems. Since it are only a few users, I create them manually instead of getting them from a LDAP source.
First create a group that will contain all users via Account -> Groups
-> Add Group (button).
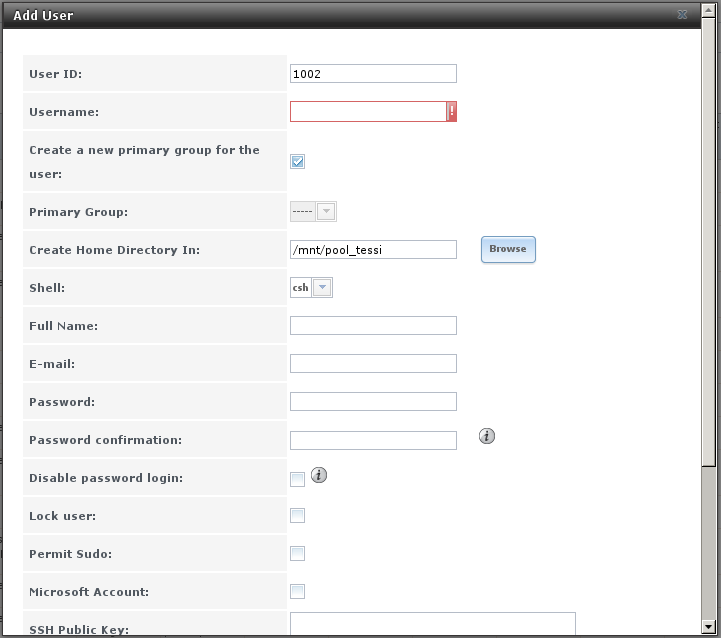
 And then create all the accounts that I need via Account -> Users ->
Add User (button).
And then create all the accounts that I need via Account -> Users ->
Add User (button).
Certificate setup
I want the GUI to be protected by SSL/TLS, therefor I created a CSR and got a certificate from [url=http://www.cacert.org]CAcert[/url]. Since I have the root certificates installed on my systems, it works for me. To let FreeNAS use the certificate I created, I import it via System -> Certificates -> Import Certificate (button). This will check if the key and certificate belong together and import it. After this I can enable https for the GUI by setting it in System -> General -> Certificate and System -> General -> Protocol (https). You might want to enable System -> General -> WebGUI HTTP - HTTPS Redirect option to allow typing the fqdn of the server without https:// in front of it to get to the web interface.
Footer console
I’ve enabled System -> Advanced -> Show console messages in the footer to get a nice box at the bottom of the webpage which shows what is going on on the console.
Services
To be able to use the NAS, I need some services enabled:
- AFP
- NFS
- S.M.A.R.T
- SNMP
- SSH
Additional functionality (plugins/jails)
FreeNAS has the possibility to add additional functionality. This can be
done by installing a plugin, which will use a FreeBSD jail to function.
When the jail configuration is not touched, it will try to find a free
IP from the start of the network by pinging every address in the network
and uses the first one which doesn’t respond.
I’ve changed the jail configuration (Jails -> Configuration).
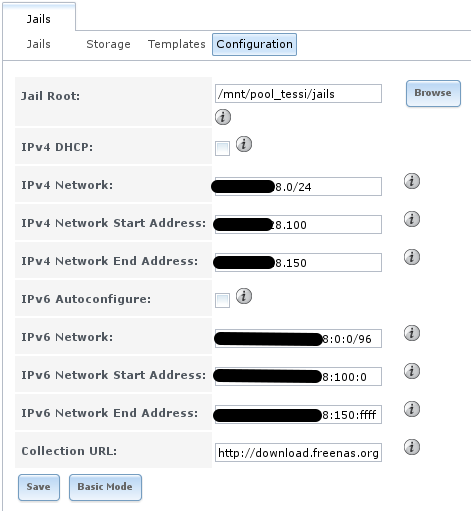 Now it will only search for IP’s within the given range.